When water enters your property, you need to remove standing moisture fast, but that’s only the first step. You also have to dry what you can’t see inside walls, floors, and framing before it spreads damage or supports microbial growth. The right tools, moisture readings, and drying plan make the difference between a stable repair and a hidden problem that returns later. What happens next often decides how much you actually save.
Key Takeaways
- Water extraction quickly removes standing water from carpets, subfloors, and crawlspaces using pumps, vacuums, and weighted extraction tools.
- Structural drying removes trapped moisture in materials to prevent warping, swelling, odors, and microbial growth.
- Moisture meters and thermal imaging help detect hidden dampness in walls, baseboards, and subfloors.
- Drying usually takes several days to two weeks, depending on saturation, airflow, temperature, and humidity control.
- Drying is complete when moisture readings return to normal, surfaces are dry, odors are gone, and readings are properly documented.
What Water Extraction Removes First
Water extraction first removes standing water, because pooled water causes the fastest spread of damage across floors, walls, and contents.
You’ll see technicians target visible water in carpets, subfloors, crawlspaces, and low spots where it collects. They use pumps, weighted extraction tools, and vacuums to pull moisture from porous materials before it moves deeper into assemblies.
This step also clears debris-laden water that can stain finishes and complicate cleanup. By removing bulk water quickly, you help stabilize the site and support the next phase of water extraction and structural drying.
You’re not just reducing water volume; you’re limiting saturation, improving access for inspection, and protecting shared spaces from further loss. That’s how your property stays on a controlled recovery path.
Why Structural Drying Matters After Water Damage
Even after visible water is removed, structural drying matters because trapped moisture can stay inside drywall, insulation, framing, subfloors, and other assemblies long after the surface looks dry.
You need controlled drying to lower moisture content in materials before swelling, warping, delamination, or microbial growth starts. When you use proper drying methods, you protect structural stability, preserve finishes, and reduce the chance of lingering odors or secondary damage.
Fast, targeted airflow and dehumidification help your property return to safe service sooner, which supports your routine and keeps your space feeling like home again.
Structural drying also gives you a measurable path to recovery, so you aren’t guessing about progress. It’s the step that turns extraction into full restoration for your team.
How Pros Find Hidden Moisture After Water Damage
Professionals locate hidden moisture by combining visual inspection with moisture meters, thermal imaging, and controlled psychrometric measurements to identify where water has migrated beyond the obvious wet areas.
You’ll see them check baseboards, trim joints, wall cavities, and subfloor seams for subtle swelling, staining, or temperature anomalies that suggest trapped water. They compare affected materials against dry reference points, so you know the readings aren’t guesswork.
By tracking moisture gradients and ambient conditions, they can map how far water has spread and whether materials are still releasing vapor. This method helps your team focus drying efforts on the real source, not just the surface.
When you understand this process, you’re better prepared to protect your property and work with confidence during restoration.
Water Extraction Tools and Drying Equipment
You’ll use extraction pumps and wet vacuums first to remove standing water quickly and reduce further material saturation.
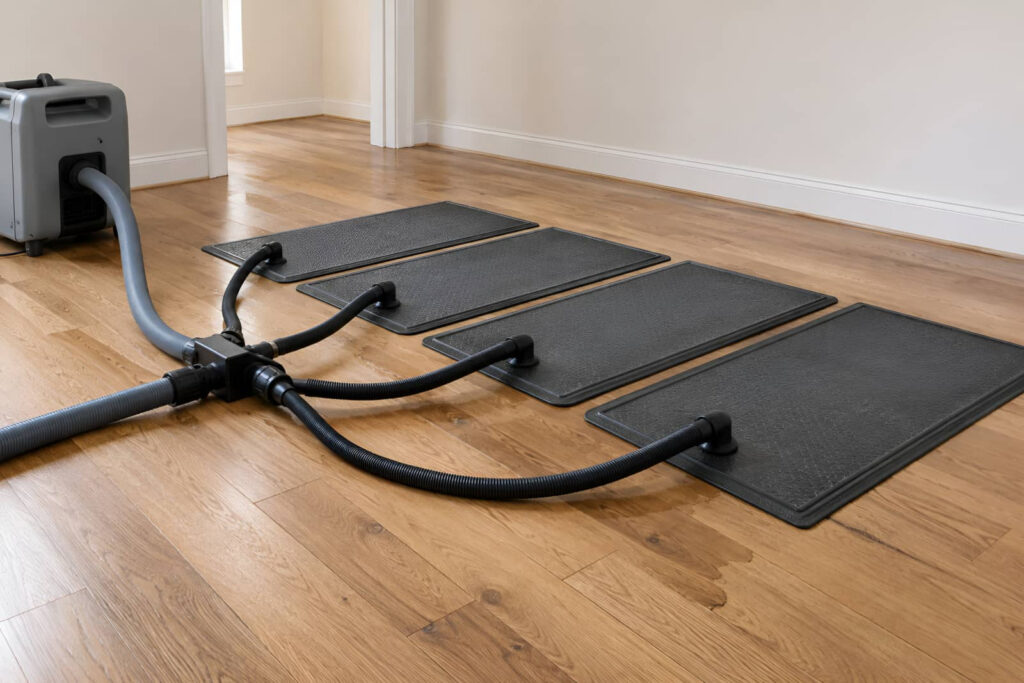
After bulk water is gone, air movers increase surface evaporation while dehumidifiers pull moisture from the air and surrounding materials.
Together, these tools help you control drying conditions and limit the risk of structural damage.
Extraction Pumps And Vacuums
Extraction pumps and wet vacuums remove standing water quickly, making them essential tools in the early stages of water extraction and structural drying. You’ll use them to reduce saturation from floors, crawlspaces, and cavities, limiting how far water can travel into assemblies.
Professional crews choose equipment based on lift capacity, hose length, debris tolerance, and access conditions.
- Submersible pumps handle deep water.
- Wet vacuums capture residual water.
- Crevice tools reach tight areas.
- Filter systems protect equipment from sediment.
When you work with the right extraction setup, you join a process built for speed, control, and consistency. That precision helps you stabilize the structure, improve surface dryness, and prepare the space for the next phase of restoration.
Air Movers And Dehumidifiers
Once standing water is removed, air movers and dehumidifiers take over to pull remaining moisture from materials and indoor air.
You place air movers to create high-velocity airflow across wet floors, walls, and contents, speeding evaporation from porous surfaces.
You position dehumidifiers to capture that vapor, lower relative humidity, and stop moisture from cycling back into the structure.
Together, these tools help you dry faster, limit swelling, warping, corrosion, and microbial growth, and verify progress with readings.
You belong in a restoration process that uses measured drying goals, not guesswork.
Technicians adjust equipment as conditions change, balancing temperature, airflow, and humidity until materials reach acceptable moisture levels.
When you use them correctly, you protect the building and support a safer return.
Steps in the Structural Drying Process
The structural drying process typically follows a series of precise steps to remove standing water and eliminate hidden moisture from affected materials.
You’ll move through a controlled workflow that keeps your property on track and helps your team stay aligned.
- You document conditions and map moisture readings.
- You extract bulk water with specialized equipment.
- You position air movers and dehumidifiers to support evaporation and humidity control.
- You monitor progress, adjust equipment, and confirm dry standards.
You’ll benefit from consistent assessment because it reduces guesswork and supports faster recovery.
Technicians track temperature, relative humidity, and material readings until conditions stabilize.
This methodical approach helps you protect the structure, maintain confidence, and feel supported throughout restoration.
How Structural Drying Works on Different Materials
Because different materials release moisture at different rates, structural drying has to be adjusted to match each surface and assembly.
You’ll see porous drywall and wood framing give up water quickly at the surface, yet they can trap moisture in cavities, so you need targeted airflow and dehumidification.
Dense materials like concrete, masonry, and plaster hold water longer, and you must drive vapor from deeper pores with controlled heat, pressure, and monitoring.
Insulation can slow drying dramatically, so you often remove wet sections to protect adjacent materials.
Metal, tile, and laminate don’t absorb much, but their seams, backs, and underlayment can still stay wet.
You work with the structure as a system, reading each material’s response and adapting equipment so your space dries safely and completely, together.
How Long Structural Drying Usually Takes
Structural drying usually takes several days to a few weeks, depending on the extent of saturation, the materials affected, and how quickly you begin extraction and dehumidification.
You’ll see faster results when airflow, temperature, humidity control, and direct access to hidden moisture are managed effectively.
In most cases, you should expect the timeline to vary by drying conditions, so technicians monitor moisture readings until the structure reaches acceptable levels.
Drying Time Factors
Drying time depends on how much water entered the structure, what materials got wet, and how quickly technicians start extraction and dehumidification. You’ll usually see faster progress when your team acts early and uses targeted drying equipment.
Material porosity: drywall, carpet, and insulation hold moisture differently.
Saturation depth: surface dampness dries sooner than water in cavities.
Airflow control: balanced movement helps moisture leave materials efficiently.
Humidity management: low indoor humidity supports stable evaporation rates.
You also need monitoring, because readings guide adjustments and keep the process on track.
In a well-managed job, you stay informed, your property stays protected, and the drying plan stays focused on restoring normal conditions without unnecessary delays.
Typical Drying Timeline
Most structural drying jobs take a few days to about two weeks, but the exact timeline depends on the water category, the amount of saturation, and how fast you start extraction and dehumidification.
You’ll usually see faster results in clean-water events with limited absorption, while drywall, insulation, and subfloors can hold moisture longer.
Your drying team should monitor moisture content, humidity, and airflow daily, adjusting equipment as conditions change.
If you act quickly, you reduce the risk of swelling, warping, and microbial growth.
In larger losses, you may need controlled demolition or extended dehumidification before materials reach acceptable dry standards.
With professional monitoring, you’ll know where you stand and can move forward confidently with your property’s recovery.
Signs Structural Drying Is Complete
When the drying process is complete, moisture readings should return to normal for the affected materials, and the surfaces should feel dry without cool spots, dampness, or visible staining.
You’ll also see stable indoor humidity and no musty odor. Your team should verify the structure with calibrated meters and document each reading for the affected area.
- Wood, drywall, and subfloors test within normal ranges.
- Air movement no longer produces dampness or condensation.
- Materials feel uniformly warm and dry to the touch.
- Inspection confirms no hidden moisture in cavities or seams.
When these conditions align, you can trust the space has reached a dry, service-ready state.
That means you’re back on solid ground with the crew that’s protecting your property.
Common Drying Mistakes That Cause Damage
You can cause significant secondary damage if you ignore hidden moisture in wall cavities, subfloors, and insulation, because trapped water keeps migrating and feeding microbial growth.
Prematurely shutting down drying equipment before moisture readings stabilize can leave structural materials above acceptable content levels and reintroduce warping, swelling, and decay.
To avoid these mistakes, you need to verify moisture at depth, not just at the surface, and confirm the structure has reached a true dry standard before demobilizing equipment.
Skipping Hidden Moisture
Skipping hidden moisture is one of the most common drying mistakes because surface dryness can mask water trapped in subfloors, wall cavities, insulation, and structural framing.
You need to inspect beyond visible finishes and verify moisture with meters, thermal imaging, and targeted openings.
- Check baseboards and trim.
- Measure flooring and subfloor layers.
- Probe wall cavities near wet zones.
- Confirm framing and insulation are dry.
If you skip these steps, you leave damp materials in place, and that trapped moisture can support microbial growth, swelling, corrosion, and odor.
Premature Drying Shutdown
Prematurely shutting down drying equipment can undo all the work you’ve done to remove hidden moisture. You may see surfaces feel dry, but subflooring, wall cavities, and insulation can still hold water above safe limits.
If you stop too soon, moisture rebounds, humidity rises, and microbial growth can start in protected areas. You need to verify dryness with moisture meters, psychrometric readings, and target materials, not just visual inspection.
Keep air movers and dehumidifiers running until readings match unaffected areas and the structure stabilizes. By staying committed to the process, you protect your property, reduce repair costs, and join the group of owners who handle water damage the right way.
Precision now prevents avoidable callbacks later.
Why Fast Water Extraction Saves More of Your Property
Fast water extraction limits how long standing water can penetrate flooring, drywall, insulation, and framing, which helps preserve more of the structure and contents.
When you act quickly, you reduce capillary wicking, swelling, corrosion, and microbial growth before they compound damage. You’re also more likely to save finishes and avoid invasive demolition that disrupts your home and routine.
- Remove bulk water before absorption deepens.
- Lower humidity so hidden materials dry faster.
- Protect electrical, HVAC, and structural systems from secondary failure.
- Improve restoration outcomes with less tear-out and lower replacement costs.
Frequently Asked Questions
Can Water Extraction Remove Sewage Contamination From Surfaces?
No, water extraction alone won’t fully remove sewage contamination from surfaces. You’ll need thorough cleaning, disinfection, and often porous-material removal to eliminate pathogens and odors, then verify sanitation before reoccupying the area.
Do I Need to Leave My Home During Structural Drying?
Usually, you don’t need to leave your home; drying equipment hums like a careful sentinel while technicians work. You should step out if safety issues, sewage, or heavy dust exist, since your wellbeing comes first.
Will Structural Drying Affect My Electricity or HVAC System?
Yes, structural drying can temporarily increase your electricity use and may require HVAC adjustments, but you’ll usually stay comfortable. Your technicians’ll isolate affected zones, protect equipment, and coordinate airflow so you’re not left guessing.
Can Furniture Be Dried in Place After Water Damage?
Yes, you can often dry furniture in place if you act fast, elevate legs, remove cushions, and use controlled airflow and dehumidification. You’ll need professionals to verify moisture levels and prevent hidden damage.
Is Structural Drying Covered by Homeowners Insurance?
Usually, yes; most homeowners policies cover sudden water damage, so you’re likely protected if the loss is accidental. You’ll want to review exclusions, document damage, and work with your insurer quickly.
Review
In the end, you need fast water extraction and disciplined structural drying to protect your property from escalating damage. You’ll remove standing water first, then track hidden moisture with calibrated meters, targeted airflow, and daily inspections until materials reach verified dry standards. Skip these steps, and you can trigger mold growth, warped materials, and costly repairs. When you act quickly and dry correctly, you’re not just limiting damage—you’re saving a small fortune.